
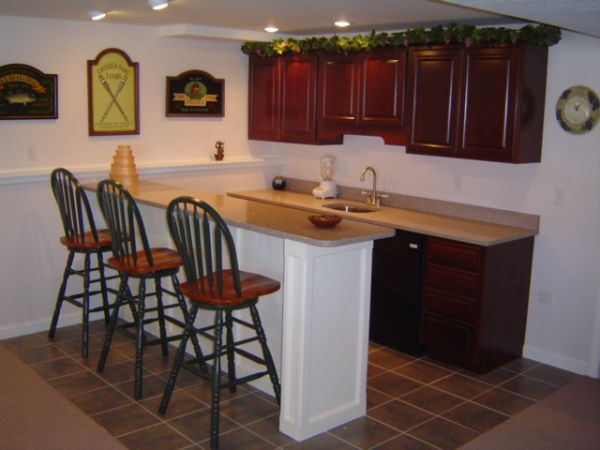

A wet bar is also called a plumbed bar. In other words, the bar has a basin with running tap water. The wet bar can be as unpretentious as a closet with a sink, or it can be a whole lot of fun area. Size the expanse where you have planned to construct the bar earlier when you resolve which add-ons to take in in your project. Building a wet bar can be an engaging project for the weekend. This also supplements significance to your dwelling place. Wet bars can be set-up in any place, interior or exterior of the house, specifically near the water lines.
Difficulty Level: Moderately challenging
Time required: 2 to 3 hours
Resources required:
- Off- the- rack kitchen cabinet
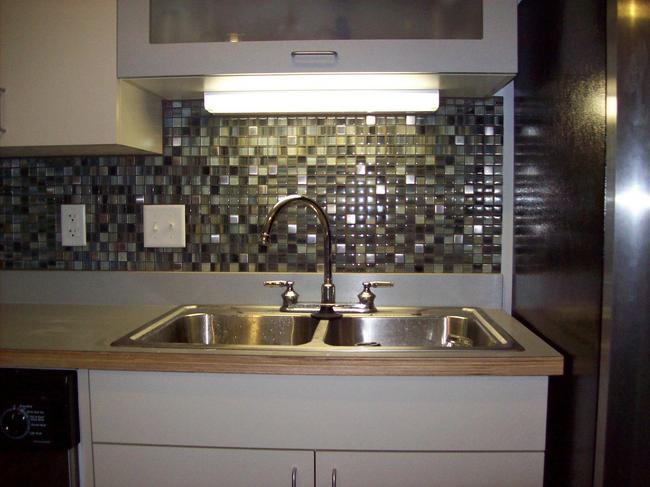
- Hand basin
- Cabinet top material
- Drill and Screw Driver
- Hammer
- Water pipes for hot and cold water
- Drain pipes
- Supporting panel
- Saw
- Paint
Instructions:
- Look for a good site to set-up a wet bar in your house. Commonly, the game room, TV room, common room or underground rooms are good sites to build a wet bar. Make certain that the location you have chosen for setting up the bar is nearer to a water line so that it is not necessary in wasting extra money in building the water system. Water line will usually be next to a restroom or laundry room. But the kitchen is the best place.
- Strategize a good plan on how you would like to build your wet bar. Outline of the wet bar, convenience and a place for everyone are to be considered.
- Buy off-the-rack filing cabinet that is of the height of a kitchen stand from any home upgrading store nearby. Make sure to purchase a cabinet which has some extra space beneath it in-order to hide all plumbing equipment like pipes and hot and cold water networks. Buying off-the-rack filing cabinets will save time and money as an alternative of buying a custom-built one. Else you can make your own cabinet if you like to do carpentry works.
- Buy the cabinetâs top. Tiles, granite slabs, Formica, wood, concrete slabs or anything else you like can be chosen as the cabinetâs top. The top should withstand the wetness.
- Buy the hand basin along with water tap and all the necessary plumbing equipment.
- Make the water link for the wet bar from the adjoining water link. Make sure to look out for the hot and cold water lines along with gutter system. It is knowledgeable to employ leave professionals to do this job, particularly if there is a need for a little extra work of flattening of the walls for hiding all the pipes.
- When all the water links are set, you can set up the cabinet. Draw a straight line with the help of a chalk or a pencil and smooth it along the wall a little above the floor.
- Then measure the area for fitting the top and bottom of the cabinet across the wall. Draw their positions with a chalk or a pencil. Now secure it using screws, a 1-by-3 lumber wood on the wall to use as provisional sustenance rail.
- Raise the cabinet to the high point on the floor by arrange the cabinet in a line with the marked points. Ensure that the cabinet is in the exact level.
- Now fasten the cabinet into the wall studs by fixing it with screws and then shape all the unwanted parts to have a good texture.
- Set up the cabinetâs top. First measure the top of your cabinet. While using granite slab, use a paper prototype and mark the holes for your basin and while using tiles, cut a supporting panel for the cabinet and set it in the place where you have planned to set the tiles. Then install the cabinetâs tile top.
- Make certain that before setting up the cabinetâs top, the correct dimension and position for your basin and water tap has been marked and cut down.
- Later put in the hand basin and the water tap as it is explained in the manufacturer’s guide.
- Examine whether the temperature and water-flow work as desired. Regulate the temperature as required and repair any leakages if it is present in the pipes or tap.
- As the last step paint the cabinet as you wish. Then clean the hand basin, water tap and the cabinetâs top to eradicate any dirt or filth existing on it.
- Place all the items required for the bar such as glasses, bottle opener, decorative accessories, and any other wet bar necessities. Put the stools as required.
Frequently asked questions:
Q. How can I test the system to see if it works properly?
A: You can always ensure that the system works well just by turning on the hot and cold water lines.
Quick tips:
- Wiring the wet bar for electricity will help in running small machines like blenders or snack machines.
- You can also include an additional cabinet for extra storage if needed.
Things to watch out for:
If there is a requirement for a key sample that may alter the blueprint of the house, then ensure if a permit is needed.