

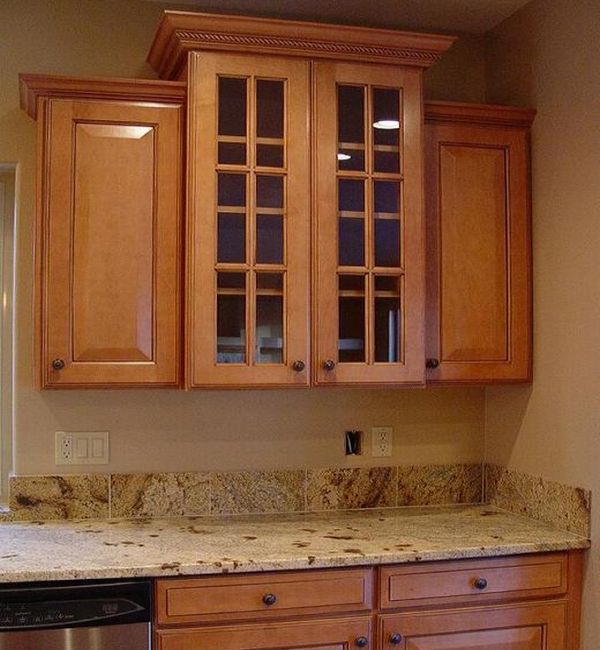

Crown molding is a decorative kind of trim which is primarily used for a particular area of your home like the ceiling of a home connecting to the wall. Originally, crown molding was used during the late renaissance period as it helped to hide the defect areas. Though crown molding is still known to function for this purpose but presently it is helpful to give an attractive look and it gracefully creates a style for the cabinet.
You can buy crown molding from a home decorative store. There are variety sizes and designs available and it can be customized according to home owner’s choice and their room. Crown molding features an innovative look and adds a finishing touch to any room that appears simple. It recovers the same old plain look or decorates your new installed kitchen cabinet. Crown molding is used on ceilings, cabinets and in bathrooms too. So why not try it on your kitchen cabinet to give it a nice look and add a value to your house.
Complexity Level: Moderate
Things youâll need
1. Measuring tape
2. Paper
3. Pencil
4. Crown molding
5. Miter saw
6. Pneumatic nail gun
7. Wood putty
8. Caulk
Process
1. In your kitchen room, take a measurement from the top of the cabinet door from the point where molding will start. Before proceeding to the next step write down the measurements on a piece of paper. You should be careful while measuring the cabinet as the measurement must be accurate as this builds a support for the molding. With the help of a measuring tape, measure the front and sides at the top of the kitchen cabinets.
2. Make a mark of the measure on a part of crown molding.
3. Keep the molding on the miter saw table, turn it upside down because the top of the molding should rest on the table while the bottom faces the saw fence. Fix the miter saw at a 45 degree angle cut the molding as per the size.
4. Ask someone to help you to hold the crown molding as you need to nail it into the exact place on the top of the cabinet. Nail it with the help of a pneumatic nail gun, a kind of a tool used to drive nails into wood or some other material.
5. The nail holes should be filled up with wood putty and you also need to cover if you find any gaps in between the crown molding and the cabinet with caulk. Use small bead of caulk to the gaps and further smoothen caulk with the help of your finger.
6. Complete the molding to go with your cabinet.
Things to watch out for
Be cautious to check whether the molding is attached perfectly to the bottom as to prevent it from falling. However adding crown molding is moderate enough but you require a lot of patience to it give a professional look.
If you prefer more than simple crown molding you may use the fancy corners than the standard ones.
Frequently asked questions
Are design, size, and materials used for crown molding in a room is related to paint and stain?
Yes, crown molding is related to paint and stain in a room.
What is the difficult part of crown molding?
The difficult part of crown molding is to acquire the exact cuts so that it is placed properly along the wall and ceiling because the exact cuts helps to place the nail easily and matches the decor.
Is crown molding expensive?
Certain styles of crown molding may be quite expensive. Finally, it depends on the homeowner’s budget.
Is it necessary to cut the crown molding at 45 degree angle?
Well, it depends according to shape of the cabinets. Since, it is found that most of the cabinets have a perfect square corner so cutting the crown at 45 degree will be suitable enough.